Red-white-and-blueberry tart
Originally published here: https://doctoremi.com/red-white-blueberry-tart/
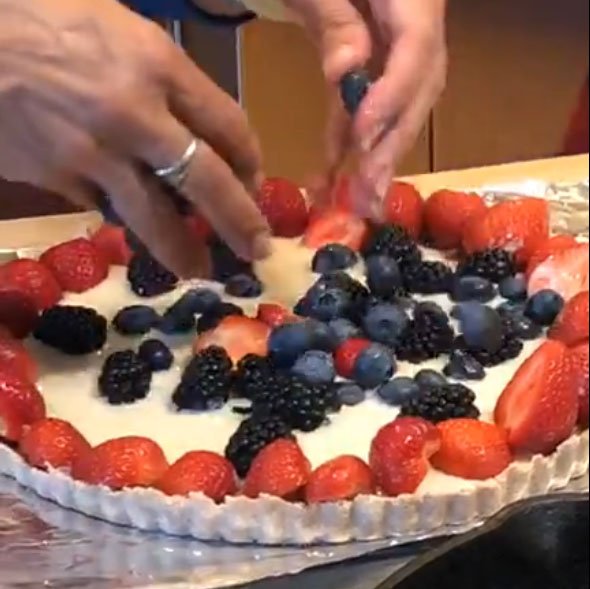
Use an abundance of seasonal berries (you can add other fruits as well, like poached pear, mango, pineapple, etc.) to make this delightful gluten-free, vegan summer dessert!
Click the image to watch me make this recipe on Instagram Live!
Ingredients
Custard Filling
1 14-oz can coconut cream
2 tbsp lemon zest
2 tbsp lemon juice
2 tbsp arrowroot starch
2 tbsp tapioca starch
1 tsp vanilla
Tart Shell
1 cup coconut flour
1/2 cup tiger nut flour
1/2 cup cassava flour
3 tbsp palm shortening or coconut oil (or other butter substitute)
2-3 tbsp coconut milk
1/2 tsp nutmeg
1 tsp vanilla
1 tsp cinnamon
Instructions
Preheat the oven to 350 degrees.
Make the crust by mixing the 3 flours as well as the cinnamon and nutmeg in a bowl, then cutting in the palm shortening/coconut oil/butter substitute until crumbles form (you can use a stand mixer if you prefer). Add the vanilla and then the coconut milk bit by bit until the crumbles are more moist and easily formed into a dough.
Place the dough on a cassava-floured piece of parchment on a board, cover it with another piece of parchment or wax paper and roll it out until it’s about 1/3 inch thick. Flip the crust into a tart or pie shell (you can also just press the dough into a tart shell).
Pierce the shell with a fork all over and bake 10-15 min until golden; let it cool.
Meanwhile, place the coconut cream and lemon zest in a small saucepan and whisk to combine.
Add the lemon juice and arrowroot starch to a small mixing bowl and whisk to thoroughly dissolve. Then add to the coconut cream mixture and stir.
Lastly, add maple syrup (you can add more if want it sweeter) and whisk again until well combined.
Place saucepan over medium heat and bring to a low bubble—not a boil—whisking often. Once it starts bubbling and getting thick, reduce the heat to medium-low and continue cooking until a visible ribbon forms when spooning a bit of the curd across the top. It should be thick and kind of jiggly in texture. During this process, switch to a rubber spatula for stirring to ensure the curd isn’t sticking to the bottom or sides of the pan.
Remove from heat and taste, adjusting seasonings as needed (e.g., add more lemon zest for acidity/brightness, or maple syrup for sweetness).
Let rest for 15 minutes, then whisk the mixture once more and transfer it to a glass bowl, jar, or pour it directly into the cooled tart shell and top with berries in a pretty pattern.
Recipe Notes
Notes: Use as many organic ingredients as possible.